Session 7: festival of fun (aug 6 to 9)
Hello parents! This page reflects some of the activities we covered during the week!
Check out our activity gallery too! :) We also have posted up some sneak peak screenshots from our lessons!
Morning Presentations

(All accompanied by a fun interactive game quiz Kahoot!)
This week our morning presentations centered Robotics and how we can make use of these amazing creations in our lives. Our tech instructors prepared some thought-provoking presentations aided with some neat videos covering the latest innovations robotics!
Day 1: Welcome and Core Values presentation! What is self-control and how can we manage our emotions?
& Introduction to fun rollercoaster theme for the week!
Day 2: Physics of Roller Coasters
Day 3: Rollercoaster Facts, Facts, Facts!
Day 4: Minecraft Presentation!
SNEAK PREVIEWS FROM OPENING PRESENTATIONS!


activity photo gallery!
Check out our cool snapshots of all the fun activities and learning from Bot Battles this week!
COMPUTER BASICS


What’s the difference between a kilobyte and a megabyte?
How do you save your files? How do you copy files from one location to another,
What’s the difference between ROM and RAM and much much more!
This class introduces children to multiple computer basic concepts that they may not have been exposed to before, as well as hands on exercises and an accompanying Kahoot to test their understanding and knowledge!

3D SLASH (CREATIVE DIGITAL 3D BUILDING)


Students learned 3D modelling techniques in an awesome program called 3D Slash. Check it out here!
This is a great tool to enable youth to think, create and design objects in a 3D space – a very valuable digital art skill. The coolest thing about 3D Slash? You can design a model and then export it to take it to a 3D printer! Yes, it exports blueprints! Students can also design game assets and robotic builds! ( Several students chose to save their models to their USBs. )
They were introduced to multiple concepts:
Polygons
Frames Per Second
Texturing
Advantages of Low Poly vs High Poly
PISKEL (CREATIVE DIGITAL 2D ART)


Note: The animations above were created by Quintin, one of our red-group students. (Several students chose to save their work to their USBs!)
Piskel is an online sprite editing tool that allows you to make changes to existing sprites or make your own 2D sprites from scratch! It also allows you to add frames which is super awesome because you can create your very own sprite animations (movement) in any 2D game.
Students learned how to use sprite design tools and create mini animations. Several students saved piskel files to their USBS.
To load an existing piskel file type, follow the instructions below:
Visit the piskel webpage here
On the right side of the screen, select the folder icon
Click the “Browse .piskel files” option
In the window that pops up, navigate to the file on the USB
Voila, your previously created piskel file will load in
HTML & CSS (WEB CODING)


Campers learned the basics of web design using HTML and CSS! They started by learning about the correct file folder setup, naming conventions for files, and what a hackable text editor is. In the HTML portion of the class, they learnt about the <title> tag, headings <h1> and <h2>, the <paragraph> tag, how to create lists with <ul> and <li>, and how to add images with the <img> tag. They then moved onto styling their web page with CSS. They changed the background colour of their websites, modified their text’s font, colour, and size, and edited their images!
If your child is interested in continuing working on their code, we were using Atom / Notepad++, both free text editors that colour codes text for easier viewing and gives users access to code shortcuts!
You can download it from Atom’s website here!
Or from Notepad++’s website here!
EV3 MINDSTORMS
Students had a chance to build and program our EV3 Mindstorms robots. What is EV3 Mindstorms? I’m glad you asked! EV3 enables students with the creative power to build and command their own robotic LEGO creatures, vehicles, machines and inventions! And yes, they are fully programmable too! Student’s created design builds for theme parks!
robotics with lego we do / theme parks!


The lego we do system really contains everything you need to ignite your child's desire to learn while enhancing their skills in science, engineering, technology, and coding. Paired with a robotics code building app, children walk through instructions to tinker and build mini robots and program their behaviour too!
Students worked on creating an amusement park to run through with their robots!

PERLER BEADS (TINKERING ART)
Seeing kids concentrate on these little pieces of adorable art while learning how retro pixel art works is honestly the best feeling ever! This tinkering activity takes a truck load of concentration and patience and also produces hyper focus in children (and adults). When things go terribly wrong it teaches important lessons about how to practice self control and show compassion to others.
Who would have thought that these little beads have so much teaching potential?!
SCRATCH ACTIVITY
Students created their video game using Scratch (some students saved it to their USBs).
HOW TO PLAY AT HOME:
Please click the orange link above access Scratch. If you do not see the code editor, click CREATE at the top of the screen.
Plug in the USB and keep an eye on the .sb2 file location.
In the create window, click 'File' on the grey bar at the top of the screen.
Select upload from your computer and select the file from the USB.
Click YES to replace the contents of the project.
Press the green flag at the top of the screen to play!
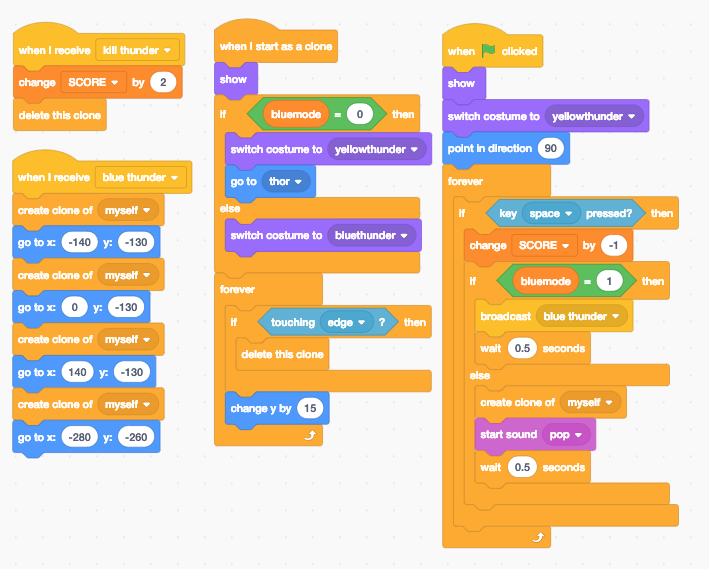
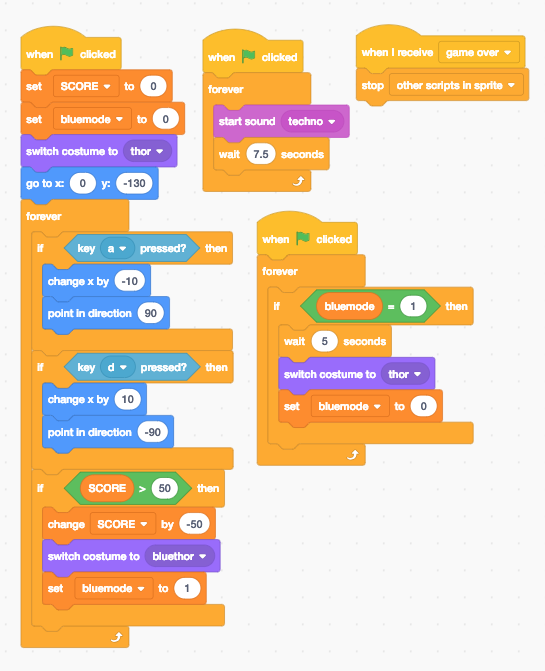
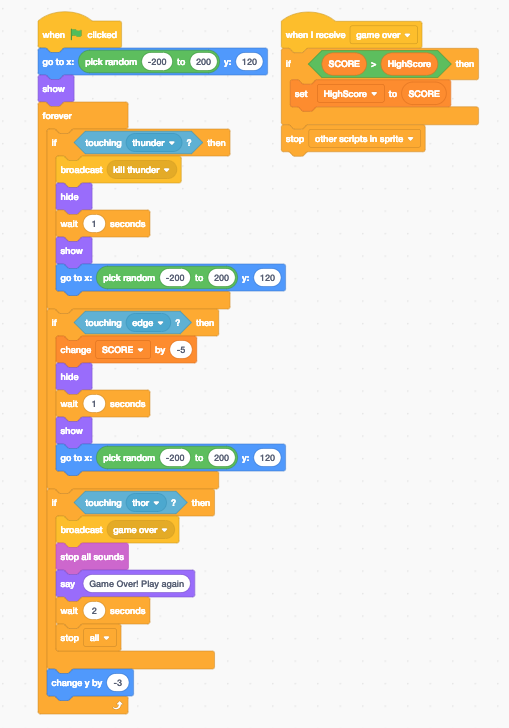
We worked on different projects not all campers got the same projects here is an example of what some of our campers covered: game called IronManRecycles! This game is tons of fun! We had the opportunity to finish off our entire game before leaving class! As IronMan we need to kick the recycle out of our way and into the recycle bin to stay alive and gain score!
Here are some screen shots from the code: Try and replicate this game at home!

stop motion - pixelation and lego film production


MINECRAFT activity!
Hello Parents! (please see links to maps below!)
Below, you will find compressed Minecraft world saves of their projects and activities from the camp! These worlds are for Minecraft Java Edition, played on the computer. Unfortunately, if you have Minecraft's Bedrock Edition, Pocket Edition or console, these world saves are not compatible. But don’t fret! I’ve taken some in-game screen shots from the worlds, so you can still take a look at some of their Creative builds and Survival bases!
While the maps were originally played on The Cube's multiplayer server, they have been converted into single player maps so that the kids are able to keep playing and building from home! They are welcome to do whatever they please with these maps as they are now entirely theirs!
How to Change the Version of Minecraft:
Open Minecraft.
Click on the "Installations" tab. If you cannot see it, make sure you are on the Minecraft: Java Edition tab, not the News tab.
Select "+ New".
Now you can select the Version number from the dropdown list. Don't worry about any of the other settings. You can also give the configuration a name (optional).
Select "Create".
Now, go back to the “Play” tab. At the bottom of the window, underneath the PLAY button, click the dropdown and select the configuration you just created.
After pressing PLAY, there will be a quick download, then the Version will be updated and ready to play!
How to Install Minecraft World Saves:
In order to play these maps, the files need to be extracted or unzipped so that they look like normal folders. Each zipped folder is a different map.
Folder (ZIP) Downloads:
Blue Group Redstone
Blue Group Survival
Red Group Redstone
Red Group Survival
Minecraft Version: 1.14.3
Details: Campers worked together to build, explore, and survive in Minecraft. They built bases, collected resources, and found treasure!
You will need to locate your .minecraft save folder, and this will vary depending on your computers' operating system. This is a link to the Minecraft Wiki page that gives a more detailed explanation if you would like, but here is my simplified and easy way of accessing the correct folders:
For Windows: I recommend using the search bar to find %appdata% and then locating the .minecraft folder. The saves folder is where you will drag the entire unzipped folder(s) into.
For Mac: Open up the Finder. Press SHIFT COMMAND G, and a window that allows you to search for a certain folder will appear. Paste this in: ~/Library/Application Support/minecraft. This will navigate to your Minecraft folder. The saves folder is where you will drag the entire unzipped folder(s) into.
This should give you everything that you need to know to get the Minecraft single player world up and running! Good luck and happy adventuring!
- Kristen aka NytDwellur :)


THANK YOU, FROM THE CUBE STAFF AND VOLUNTEERS!

Cheers and have a fantastic summer!